

Key Takeaways
- Successful composting requires a balanced mix of carbon-rich 'browns' and nitrogen-rich 'greens' materials.
- Turning your pile regularly and maintaining proper moisture speeds up decomposition significantly.
- Finished compost improves soil structure, drainage, and fertility without synthetic fertilizers.
- Certain items like meat, dairy, and diseased plants should always be kept out of home compost piles.
- Most home compost piles produce usable material within two to six months under good conditions.
What you will need
Why Composting Belongs in Every Backyard
Composting is one of the most practical habits a home gardener can adopt. It diverts organic waste from the landfill, reduces the need for store-bought soil amendments, and steadily improves the quality of your garden beds over time. The end product - finished compost - feeds soil microbes, improves structure, and helps the ground retain moisture more effectively.
Whether you're starting a vegetable garden for the first time or maintaining an established landscape, incorporating compost is one of the most durable investments you can make in your soil. It's also a natural fit within a year-round outdoor care routine, with different seasons providing different inputs and different tasks.
The process requires no special expertise - just an understanding of what microbes need to do their work: a balanced diet of carbon and nitrogen, adequate moisture, and regular air circulation.
What you will need
What You'll Need to Get Started
Setting up a compost system doesn't require much equipment, but having the right tools makes the process smoother and more consistent. Review what you'll need before you begin.
Compost bin or designated pile area
Contains and organizes organic material while retaining heat needed for decomposition.
Pitchfork or compost turning tool
Used to aerate the pile by turning layers, which accelerates breakdown.
Garden hose or watering can
Allows you to add moisture when the pile becomes too dry.
Kitchen scrap collection container
A small countertop bin for collecting food scraps before transferring them to the outdoor pile.
Compost thermometer
Measures internal pile temperature to confirm the pile is actively decomposing.
Beyond physical tools, the key input is a steady flow of raw organic material. As you build the habit of composting, you'll naturally start noticing the compostable potential in items you once discarded without a second thought - eggshells, cardboard packaging, spent herb cuttings, and coffee grounds all qualify.
Step-by-Step: Building and Maintaining Your Compost Pile
Follow these steps to build a compost system from scratch and maintain it through to your first harvest of usable material. Each step builds on the last, and understanding the reasoning behind each one will help you troubleshoot confidently as your pile matures.
Choose and set up your composting location
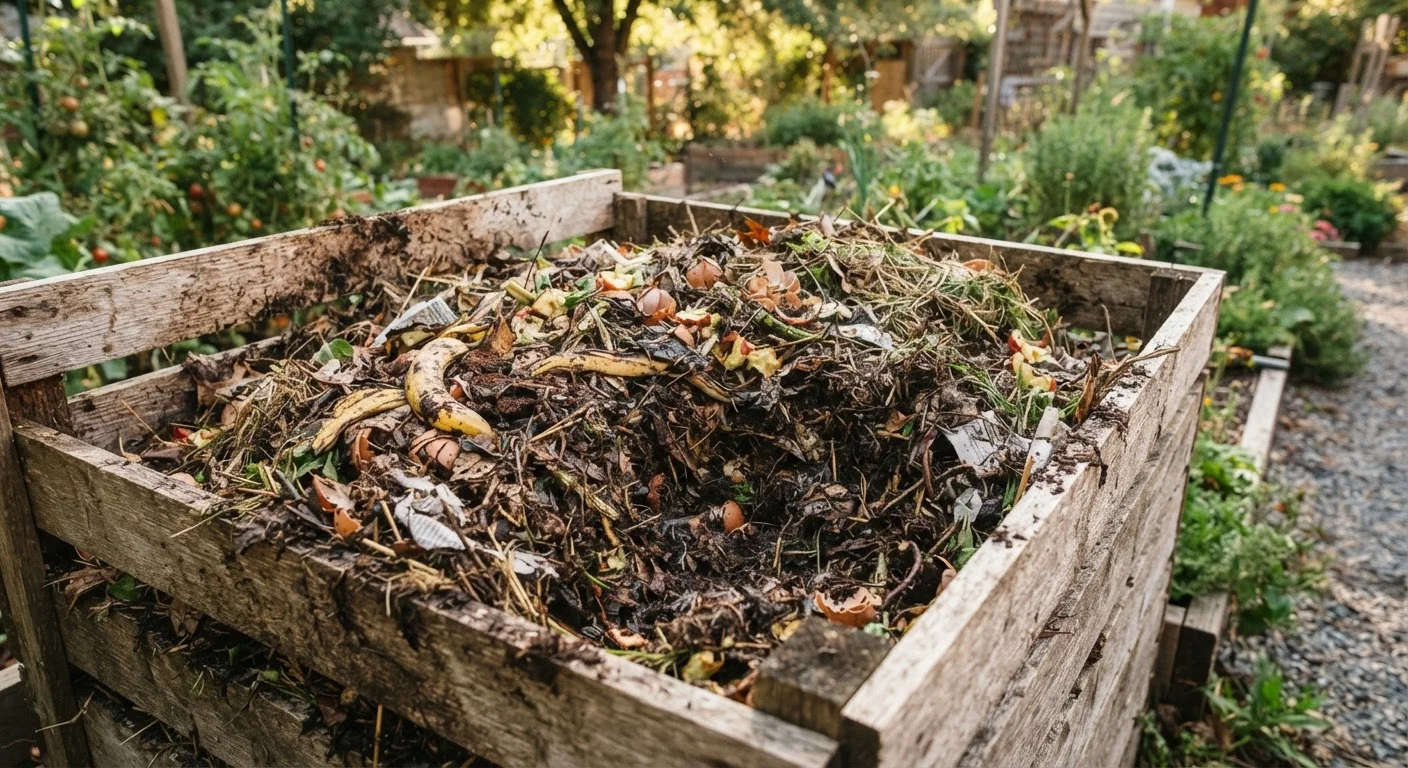
Select a spot in your yard that gets partial shade and is convenient to reach year-round. A 3-foot by 3-foot footprint is generally the minimum size needed to generate enough heat for decomposition. You can use a manufactured bin, build a simple three-sided enclosure from pallets or wire mesh, or simply designate an open pile. Place the bin directly on bare soil so that beneficial organisms such as earthworms and microbes can move in from below.
Understand what to add and what to avoid
Compost materials fall into two categories. Browns are carbon-rich materials: dry leaves, cardboard torn into small pieces, straw, wood chips, and plain paper. Greens are nitrogen-rich materials: vegetable and fruit scraps, coffee grounds and filters, tea bags, grass clippings, and plant trimmings.
Keep these items out of your pile:
- Meat, fish, and bones
- Dairy products and fats or oils
- Pet waste
- Diseased or pest-infested plant material
- Treated or painted wood
- Glossy paper or coated cardboard
Layer your materials in the right ratio
A well-balanced compost pile uses roughly 3 parts browns to 1 part greens by volume. Start with a 4- to 6-inch layer of coarse browns on the bottom - this promotes airflow. Add a layer of greens, then cover with more browns. Continue alternating as you add new material. Smaller pieces break down faster, so chop or shred bulky items when possible.
Maintain moisture and aeration
Your pile should feel as damp as a wrung-out sponge - moist throughout but not dripping wet. During dry spells, water lightly with a hose. During heavy rain, cover the pile with a tarp to prevent waterlogging, which can deprive microbes of oxygen. Turn the pile with a pitchfork every one to two weeks, pulling material from the outer edges into the center. This reintroduces oxygen and distributes heat evenly.
Monitor progress and troubleshoot problems
A healthy, active pile will feel warm in the center - sometimes hot enough that you can feel heat rising when you turn it. If the pile is cold and inactive, check that it's moist enough and has sufficient greens. Common problems include:
- Slimy and smelly: Too wet or too many greens - turn and add dry browns
- No decomposition: Too dry or too small - water and add nitrogen material
- Pest activity: Food scraps too close to the surface - bury new kitchen scraps in the center
Harvest and use your finished compost
Finished compost looks dark brown, crumbles easily, smells earthy, and no longer contains recognizable food or plant pieces. This typically takes two to six months depending on conditions and how often the pile is turned. Harvest from the bottom of the pile, where decomposition is most advanced. Spread finished compost 1 to 2 inches deep over garden beds, mix it into potting soil, or use it as a top dressing around established plants. It's particularly valuable for amending heavy clay soils or improving sandy soils that drain too quickly - making it an excellent complement to a raised bed setup.
Speed Up Decomposition Year-Round
Composting slows naturally in cold weather as microbial activity drops. You can extend the active season by insulating your pile with straw bales or a thick layer of dry leaves around the outside. Even in winter, the pile continues to break down slowly - and it will reactivate quickly once temperatures rise in spring.
Putting Your Compost to Work
Once you have finished compost available, the uses extend well beyond simple bed topdressing. Work it into the soil before planting each season, blend it with native soil to improve drainage, or use it to fill in gaps in low-maintenance landscaping areas where you want to encourage self-sustaining plant health.
Over multiple seasons, consistent compost additions shift the biological makeup of your soil in ways that benefit plants long-term - improving drainage in clay-heavy soils, increasing water retention in sandy soils, and supporting the microbial ecosystem that makes nutrients available to roots. Healthy, well-amended soil is also a meaningful factor in managing your property as a long-term asset, since strong landscaping contributes to curb appeal and overall property condition.
Start with a small pile, be consistent about adding materials and turning regularly, and within a single growing season you'll have a resource that enriches every corner of your garden.